How to Remove Scratches From an Old Photo (and Add Color)
Fix scratches, dust and stains on a scanned old photo with AI, then colorize it. Scanning tips, which preset to pick, and how to check the result.
· 6 min read
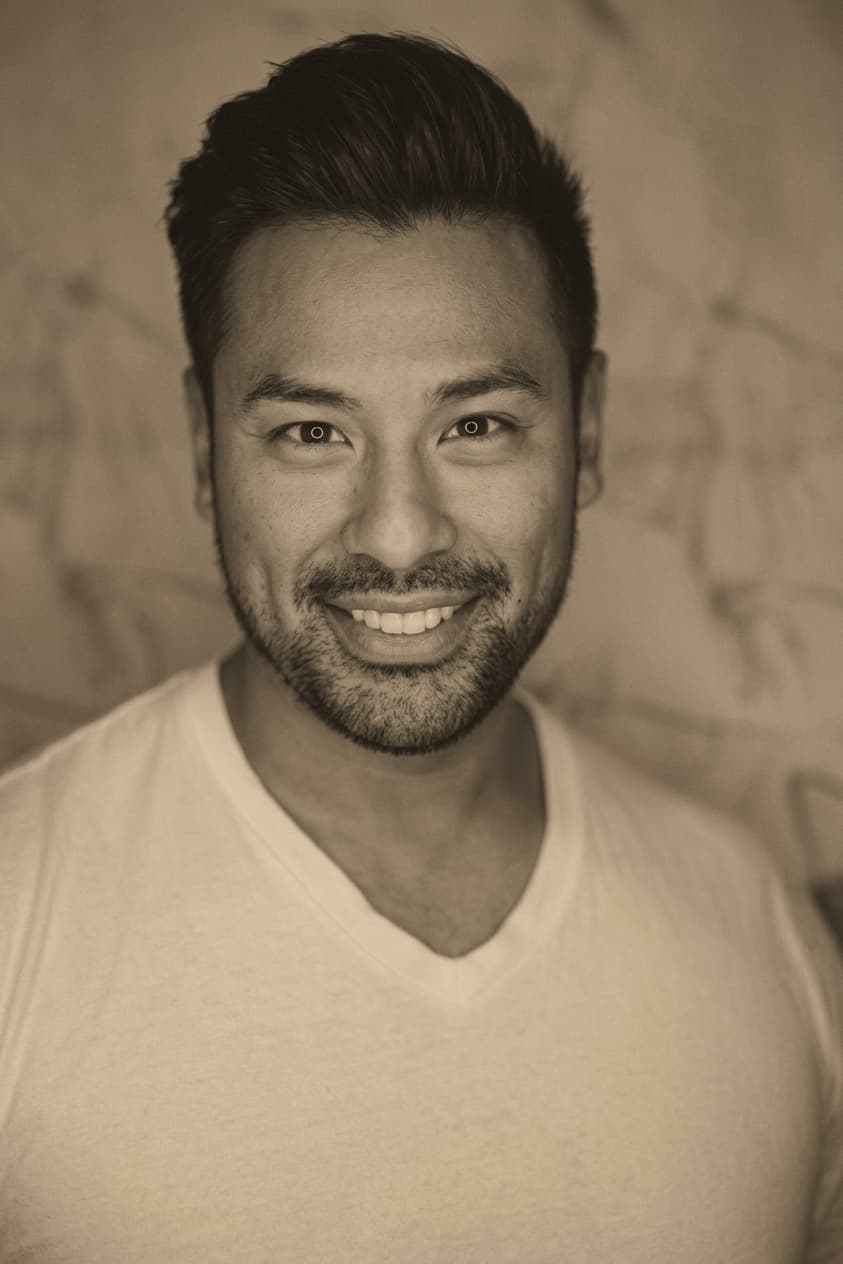
Real output from Photo Restore.
Scratches, dust specks, water stains and a yellow cast are the four things that make most family prints look old. The good news is that a decent scan plus one AI repair pass fixes most of it in a couple of minutes. The catch is that the order matters, and a few kinds of damage can only be guessed at, not recovered.
This guide walks through the whole job on a real example: a scratched, stained sepia portrait that we ran through Photo Restore with the Fix damage preset.
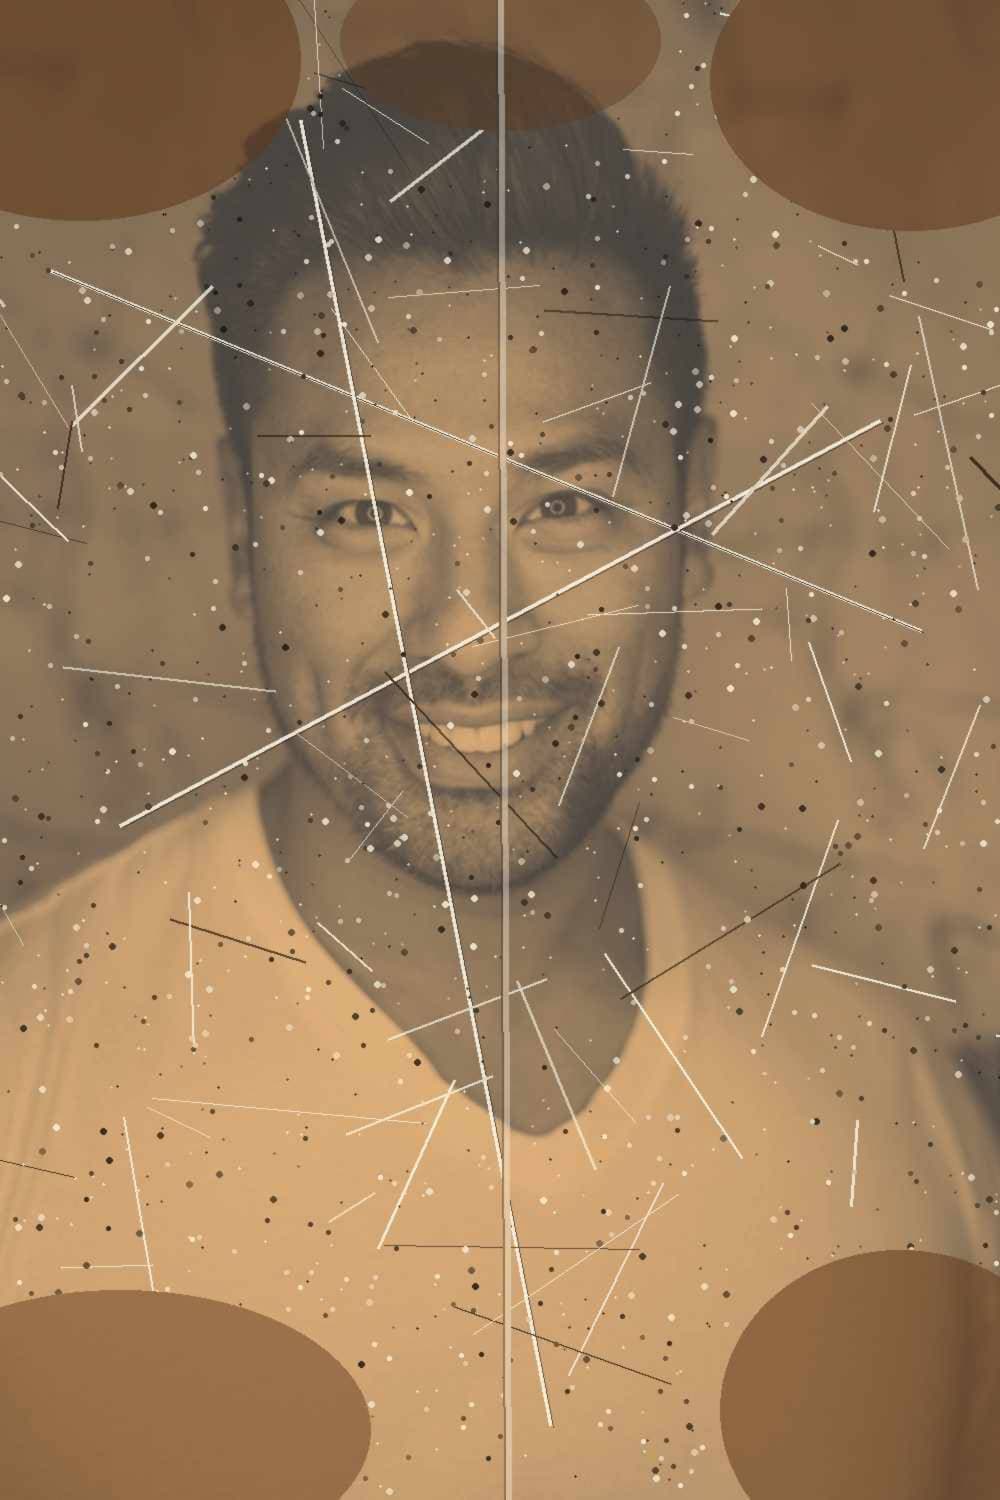
Example: scratched stained sepia scan → Fix damage preset (real Many AI Tools result).
 BeforeAfter
Look at what changed and what didn't. The crossing scratches, the white dust, the vertical crease and the brown stain blobs in the corners are gone. The face, the expression, the haircut, the T-shirt and the sepia tone are the same person and the same photo. That is what you want from a restore: repair, not a new picture.
Step 1: Get a clean scan
AI repairs what it can see, so give it the best copy you can.
- Use a flatbed scanner if you have one. 600 DPI is a good default; go to 1200 DPI for small prints (wallet size and smaller) so faces have enough pixels to work with.
- Phone photo instead? Lay the print flat in soft daylight near a window, turn the flash off and hold the phone parallel to the print. Flash glare shows up as a white band that the AI treats as damage.
- Brush off loose dust first with a soft dry brush or microfiber cloth. Don't use water or cleaner on old prints.
- Crop and straighten before you upload. A tilted scan with scanner bed around it wastes resolution on the wrong pixels.
- Keep the untouched scan. Every edit should start from a copy, so you can always go back.
Step 2: Pick the right restore preset
Open Photo Restore, drop in your scan and choose the preset that matches the main problem:
- Fix damage: scratches, tears, dust, creases, stains and small missing patches. Start here for most physically damaged prints. This is the preset used in the example above.
- Revive faded: prints that are intact but washed out or yellowed. It brings back contrast and a natural balance while keeping a period look.
- Denoise & sharpen: soft or grainy scans with little physical damage.
- Full restore: a combined pass when a photo has several problems at once.
If one specific spot is the problem, open Notes and say where it is, for example "tear on the left edge" or "water stain bottom right". Then click Restore photo.
Step 3: Check the result before you keep it
Zoom in and compare the output with your scan side by side. Check these four things:
- Faces and eyes. Is it still clearly the same person? Eyes, mouth and hairline are where over-processing shows first.
- Edges of the damage. Where a scratch crossed something detailed, such as hair or a collar, is the repair believable?
- Background texture. In our example the busy background around the man came back as a soft, slightly mottled wall. That is a reconstruction, not something recovered from the scan, which is fine for a portrait but worth knowing.
- Anything added. Restore is told not to invent people, props or text. If you see something that wasn't in the original, run it again or try a gentler preset.
If a face was badly damaged or tiny in the frame, no tool can know what was really there. The AI will fill it with something plausible. For a family archive, label those copies as restored so nobody mistakes them for the original.
Step 4: Colorize it (optional)
Once the damage is gone, you can add color with Photo Colorize. Repair first, then color: if you colorize a scratched photo, the scratches get colored too.
Download your restored file, open Photo Colorize, upload it and pick a preset:
- Natural color for everyday scenes.
- Vintage warm for a softer, period film look.
- Portrait skin when a face fills most of the frame. It puts extra care into skin, hair and eye color.
- Landscape outdoors for sky, trees, buildings and streets.
If you know real colors, put them in Notes ("navy uniform", "red brick house"). Without hints, the model picks plausible colors, so treat a colorized photo as an interpretation and keep the black-and-white version as the record.
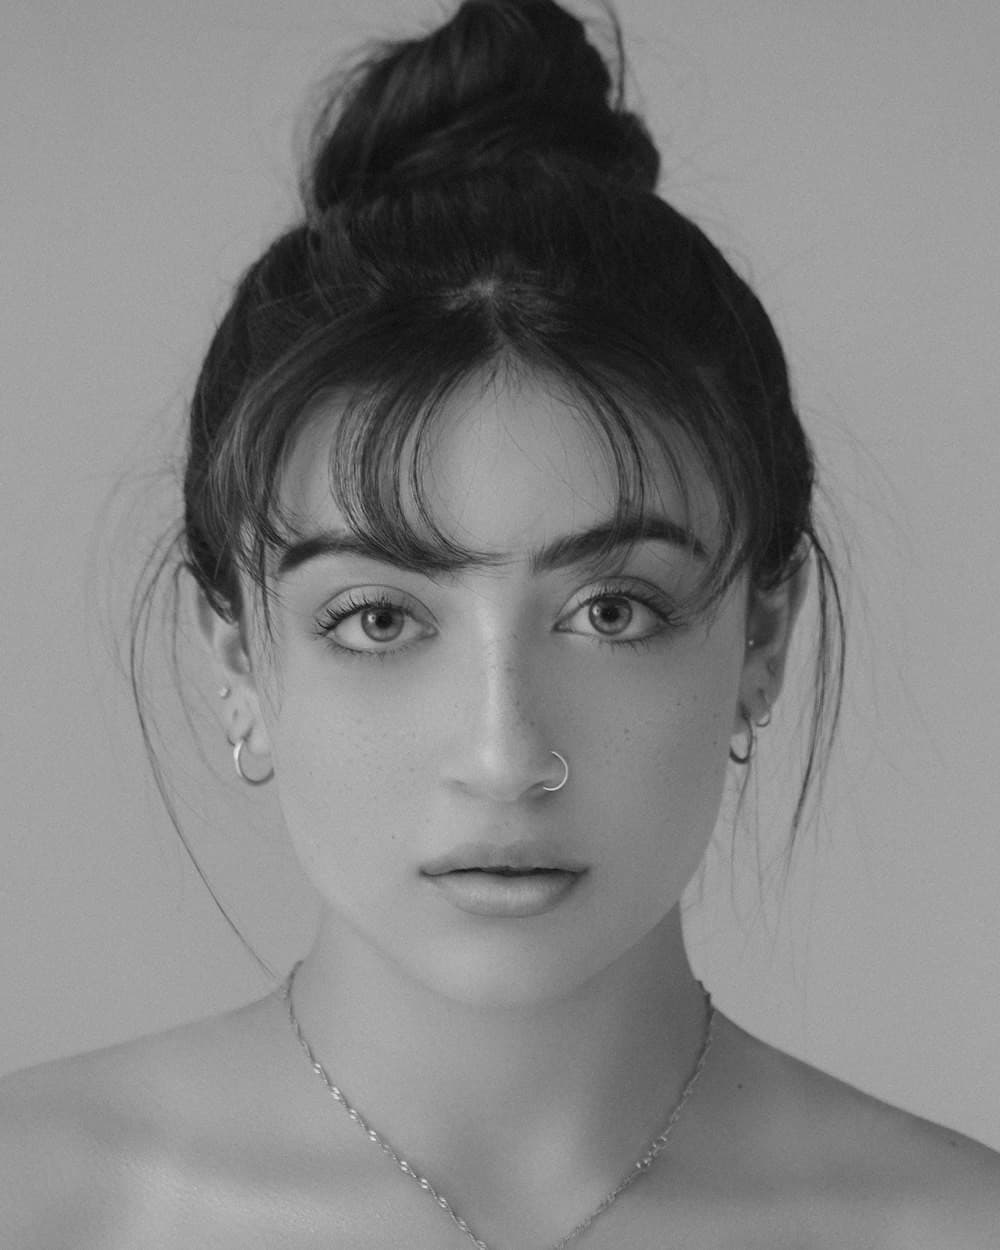
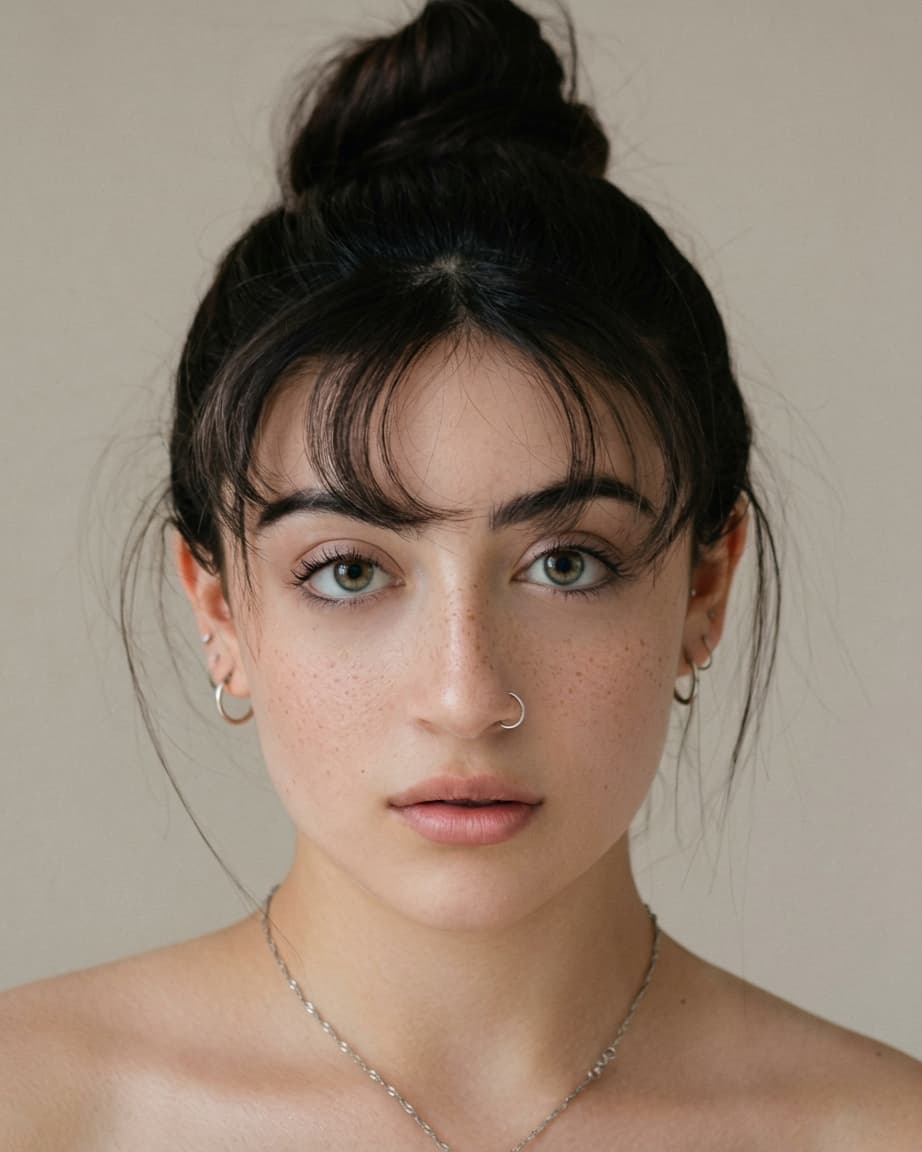
Here is a real Portrait skin result on a black-and-white studio portrait:
Example: B&W studio portrait → Portrait skin preset (real Many AI Tools result).
 Before
 After
AfterStep 5: Sharpen or enlarge last
If you plan to print the photo bigger, do any sharpening at the end with Photo Enhancer. Sharpening first would also sharpen the scratches and grain you are about to remove.
Quick answers
Can AI fix a torn photo? Yes for clean tears and small missing corners: Fix damage rebuilds them from the surrounding texture. Large missing areas, especially across a face, get a plausible fill rather than the real detail.
Will it change the person's face? The restore prompt tells the model to keep identity and composition exact. Always compare with the original anyway, especially for small faces in group photos.
Restore or Enhancer? Restore is for aging damage on old prints. Photo Enhancer is for modern photos that are blurry, noisy or dark.
Something in the photo isn't damage but you want it gone, like a date stamp or a stray object? Use Object Remover and name the thing in Notes.
Photo Restore
Repair scratches, fading, and noise on old photos in one click.